Have you ever wondered how your favorite celebrities always have perfectly shaped, flawless eyebrows?
Whether it’s the bold and defined brows of Zendaya or the soft, natural arches of Hailey Bieber, their brows always seem to frame their face effortlessly.
But when you try to shape yours, it’s a different story—uneven arches, over-plucked spots, or brows that don’t seem to match your face.
The result?
A look that feels unbalanced and unfinished, no matter how great your makeup or hairstyle is.
And let’s be honest—who has the time or budget to get their brows professionally done every few weeks?
Not me.
But here is the good news.
You don’t need a celebrity glam squad to get perfect brows.
With just a few simple tricks and the right tools, you can shape your eyebrows quickly and flawlessly—even as a beginner.
Ready to transform your brows in minutes? Let’s dive in.
The Ultimate 5-Minute Guide to Perfect Eyebrows for Beginners
What You’ll Need to Shape Your Brows
Before you get started, gather these essential tools to make the process quick and easy:
Tools
- Eyebrow stencils –For achieving perfectly shaped, symmetrical brows especially for a beginner. It acts as a guide for filling or trimming and comes in various shapes and sizes, allowing you to choose a brow style that best suits your face.
- Small Brow Scissors or tweezers – To trim long brow hairs for a polished look or pluck off stray hair. A slanted-tip tweezer works best for precision.
- Spoolie Brush for combing and shaping your brows before trimming or filling.
Makeup Essentials
- Brow Pencil or Powder – For filling in sparse areas and defining shape.
- Brow Gel (Clear or Tinted) – To set the hairs in place for an all-day hold.
- Concealer or Highlighter – To clean up the brow area and enhance definition.
- Angled Brush (If Using Powder) – Helps create natural-looking strokes.
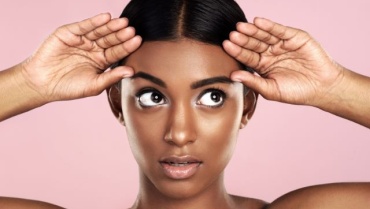
Step 1: Identify Your Perfect Brow Shape
The first step to drawing a perfect eyebrow shape is to identify your natural brow shape.
Why?
Before you pick up the tweezers, it’s important to know what eyebrow shape suits your face. The right or correct eyebrow shape can enhance your facial features. Similarly, the wrong one can throw off your entire look.
Here’s a simple guide:
- Round face? Go for high, soft arches to add definition.
- Square face? A slightly curved arch softens strong jawlines.
- Heart-shaped face? A natural, rounded arch balances sharp cheekbones.
- Oval face? You’re lucky—most brow shapes suit you!
Step 2: Brow Mapping Trick
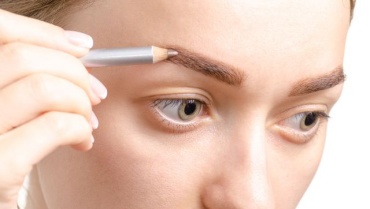
Start by brushing your brow hairs upward with a spoolie brush to see their natural shape. Then, lightly outline the shape you want using an eyebrow pencil or pomade. Follow your natural brow line to keep them looking natural and balanced.
For a symmetrical and natural look, follow the three-point rule:
- Where should your brows start? Hold a straight brush or pencil vertically along the side of your nose. Your brow should begin in line with your nostril.
- Where should the arch be? Angle the pencil from your nose through your iris—this is where the highest point of your brow should be.
- Where should your brow end? Angle the eyepencil from your nose to the outer corner of your eye. This is where your tail should stop.
- Use an eyebrow pencil to carefully mark the three focal points before bringing in your stencil.
Step 3: Position the Stencil Correctly
Most people get it wrong when choosing stencil. Ensure you’re working with an eyebrow stencil that closely matches your natural brow shape. Stencils help guide your brow structure, ensuring a symmetrical and professional look.
Place the stencil over your brow, ensuring it aligns with three key points:
- Start: Your brow should begin at the inner corner of your eye. Align the stencil’s start point with the side of your nose.
- Arch: The highest point of your eyebrow should always align with the outer edge of your iris(when looking straight).
- End: The tail of your brow should extend diagonally. It should start from the side of your nose and end towards the outer corner of your eye.
Hold the stencil firmly in place for the next step.
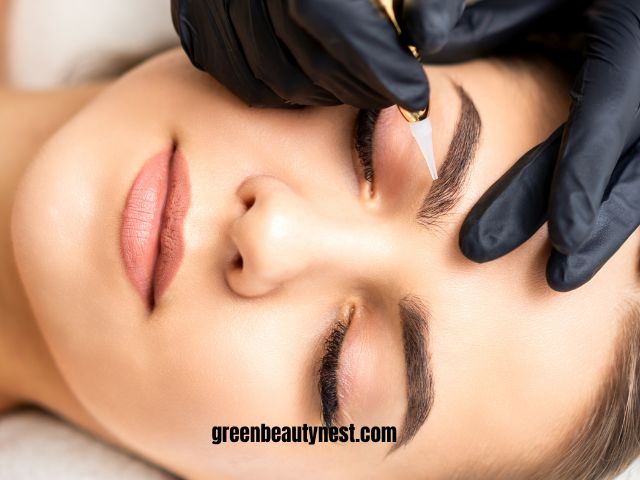
Step 4: Fill in Your Eyebrows with a Brush
Using an angled brush and brow pomade, lightly fill in the exposed brow area inside the stencil.
This is just to define areas of concentration.
I prefer using eyebrow brush because its quite faster and easy to use when holding on your stencil.
After filling in your brows with a brush or pencil, You can slowly remove the stencil and check for symmetry.
Step 5: Highlight for Extra Definition
Apply a touch of concealer or highlighter under your brows to define and brighten your brows.
Step 6: Pluck, or Trim
After you’ve mapped out your eyebrows, it’s time to clean them up.
Trim for a Polished Look – Brush your brows upward using a spoolie and trim any long hairs sticking out with small brow scissors.
Pluck Stray Hairs – Use a good pair of tweezers to remove any hairs outside your outlined shape.
Step 7: Fill & Define for a Natural Look
Even if your brows are sparse, you can create a fuller, more polished look with a few makeup tricks:
Use a Brow Pencil– Lightly fill in gaps with a brow pencil. Draw short, hair-like strokes for a natural effect.
Choose the Right Shade – Go for a shade slightly lighter than your natural eye brow color for soft definition. Too dark can look harsh and unnatural.
Blend with a Spoolie – Gently brush through your eyebrows with a spoolie to soften any harsh lines. If needed, clean up the edges with a concealer for a sharp, polished finish.
And that’s it! With the right stencil and technique, you can shape your brows quickly and effortlessly—even as a beginner. Ready to give it a try?
Step 8: Set It in Place
To keep your brows looking polished all day:
Use Clear or Tinted Brow Gel – A swipe of brow gel will hold your shape in place and give your brows a lifted fresh look.
Highlight for Extra Definition – Apply a touch of concealer or highlighter under your arch to define and brighten your brows instantly.
Takeaway
You Don’t Need to Be a Pro to Have Perfect Brows. And yes, shaping your eyebrows doesn’t have to be complicated or time-consuming. By simply mapping correctly, you can create beautifully shaped brows in minutes.
Be sure to do a little practice, if you want to do it effortlessly every time.